SMTP Configuration
To send confirmation emails and enable the forgot password functionality, you must configure an SMTP server.
You can either:
- Configure SMTP from your own server (cPanel), or
- Use Google’s free SMTP server
SMTP Configuration from cPanel
Follow these steps to create an email account from cPanel:
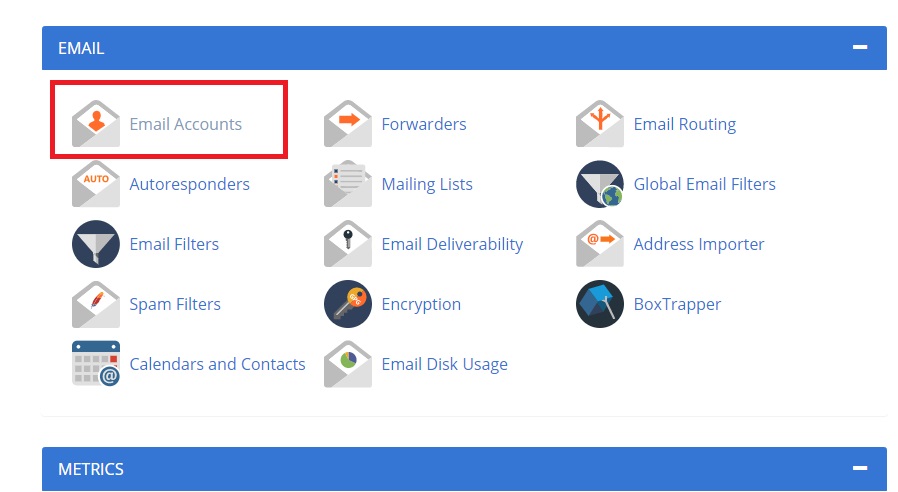
1. Login to cPanel
Login to your cPanel account and find Email Accounts.
2. Create Email Account
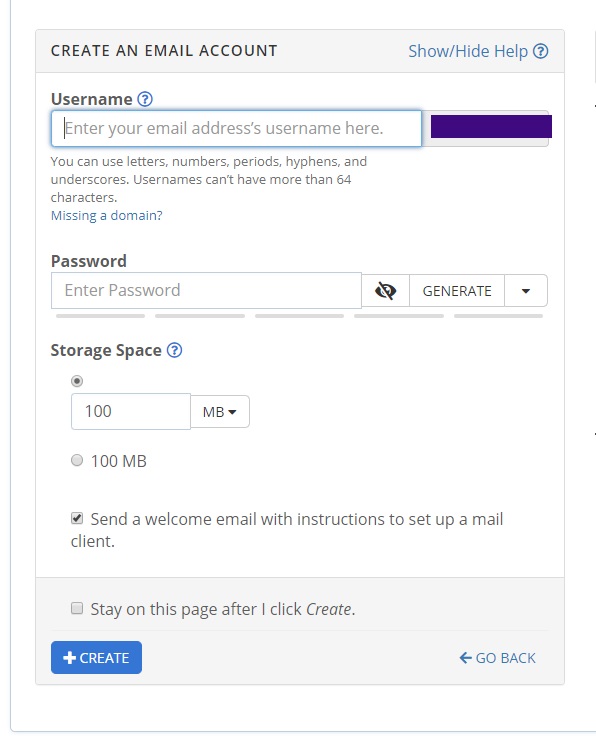
Click Create.
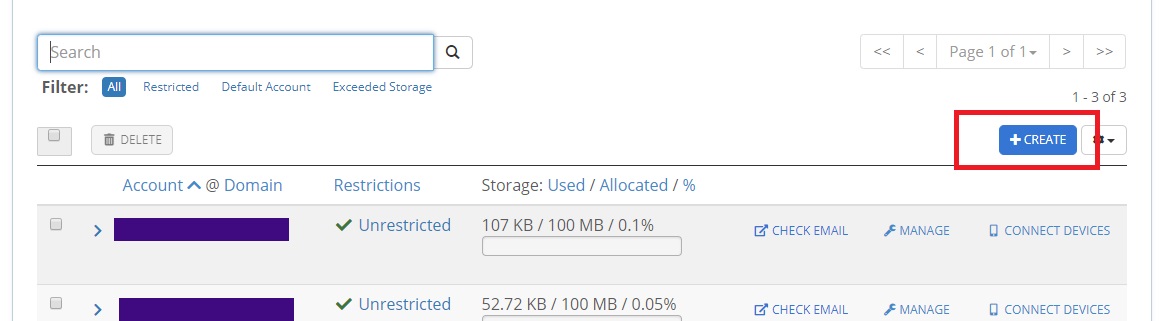
Fill up the form and create a new email account. ⚠ Copy the password — you will need it later.
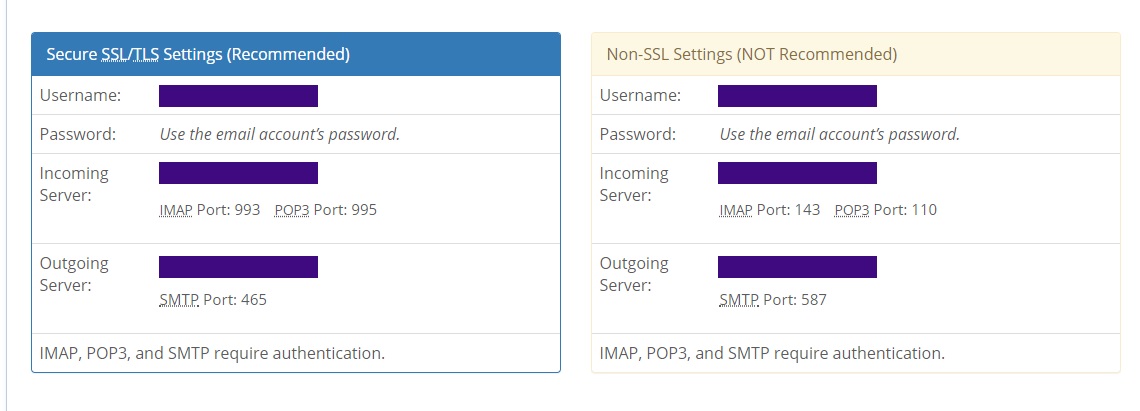
3. Get SMTP Credentials
Click Connected Devices.

You will see two configuration sections:
- SSL Configuration
- Non-SSL Configuration
Use SSL if your server has SSL enabled. Otherwise, use Non-SSL.
Save all the credential details for later use.
Google SMTP Server Configuration
Follow these steps to configure Gmail SMTP:
1. Login to Gmail
Login to your Gmail account.
Visit:
https://myaccount.google.com/security
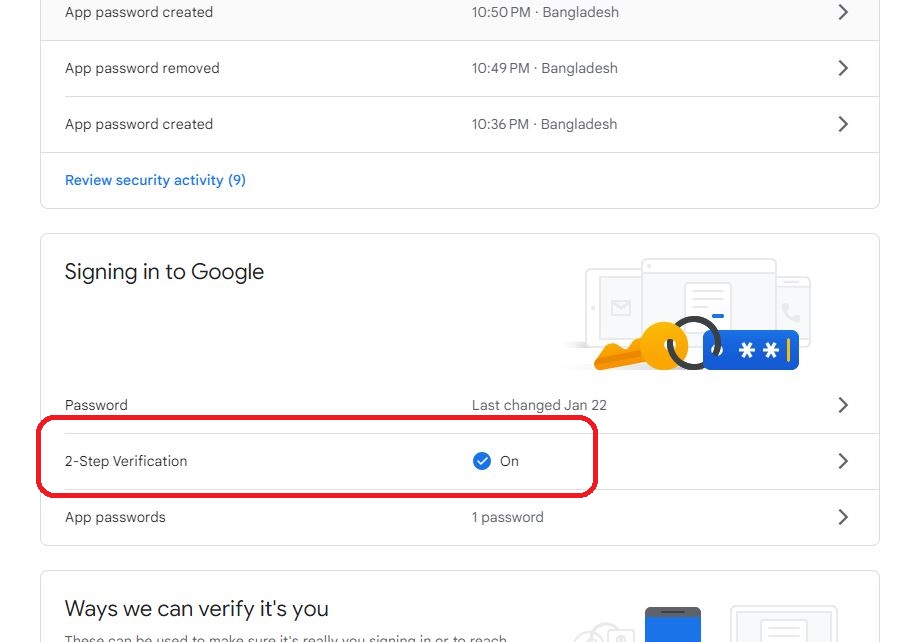
2. Enable 2-Step Verification
Turn on 2-Step Verification from the Security page.
3. Generate App Password
Go to App Passwords (you may need to sign in again).
If you don’t see this option, possible reasons:
- 2-Step Verification is not enabled
- Your account is managed by work/school
- Advanced Protection is enabled
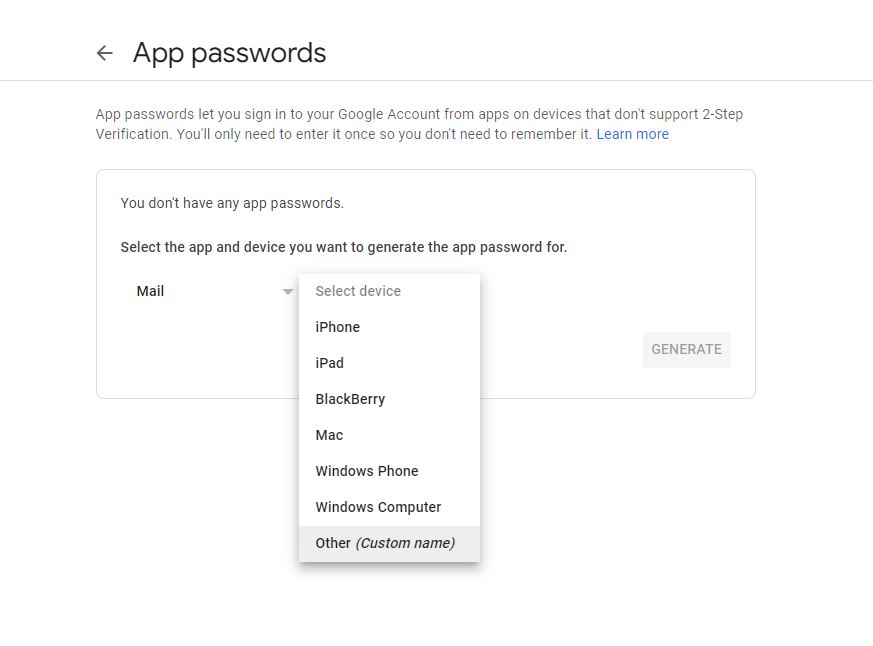
Select:
- App → Mail
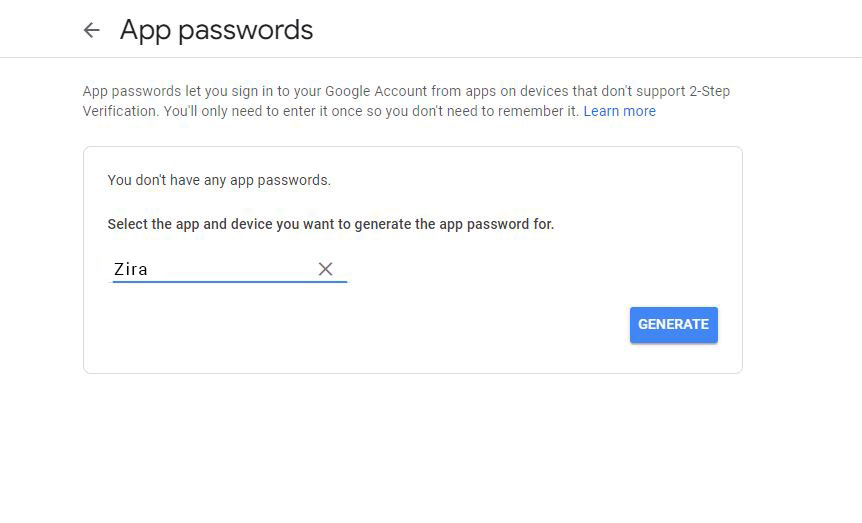
- Device → Other (Custom Name)
Then click Generate.
You will receive a 16-character App Password.
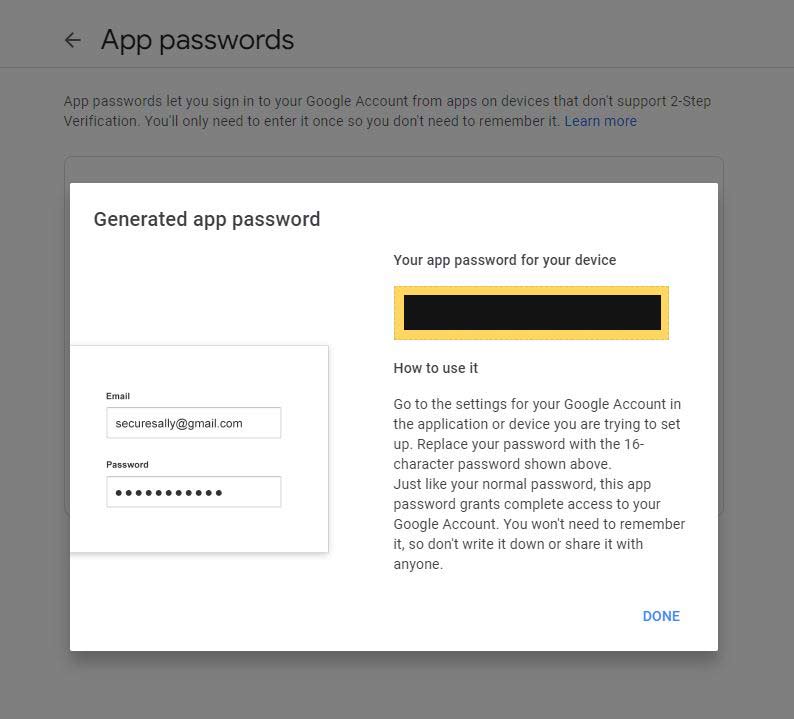
Save this password for later use.
Click Done.
4. Enable Display Unlock Captcha
Visit:
https://accounts.google.com/b/0/DisplayUnlockCaptcha
Enable it.
Setting the SMTP Configuration in Admin Panel
After collecting your SMTP credentials:
- Log in to your Admin Panel
- Go to Settings → SMTP Setting
Configure the Following Fields
SMTP Host Example:
smtp.yourdomain.comFor Google:smtp.gmail.comSMTP Port
- Non-SSL →
587 - SSL →
465
- Non-SSL →
SMTP Username The email address used for SMTP Example:
noreply@gmail.comSMTP Password The password you created (or Google App Password)
SMTP Encryption
- Non-SSL →
tls - SSL →
ssl
- Non-SSL →
Mail From The sender email address Example:
noreply@gmail.com
After saving the settings, test email functionality to confirm everything works correctly.